
Once foil designs are approved and ready to begin production, dies are created from molded metal plates with the intended foil design elements puffed out to make the necessary indentations. It is then mounted on a press, with the paper on the opposite side, and foil in between.
As a result of this manual process, shifting can occur sometimes during the pressing, where the die pushing the foil onto the paper may be slightly off from where it was originally intended to be. While this is often not noticeable, the drift can cause some visual discrepancies.
Below, we've listed some basic foil setup tips to get you started on your foiling journey. (Following the advanced guidelines here, Working with Foil & Gloss-Press®, is a great way to compensate for drift as well as cut down on back-and-forth foil adjustments!)
Basic Foil Setup:
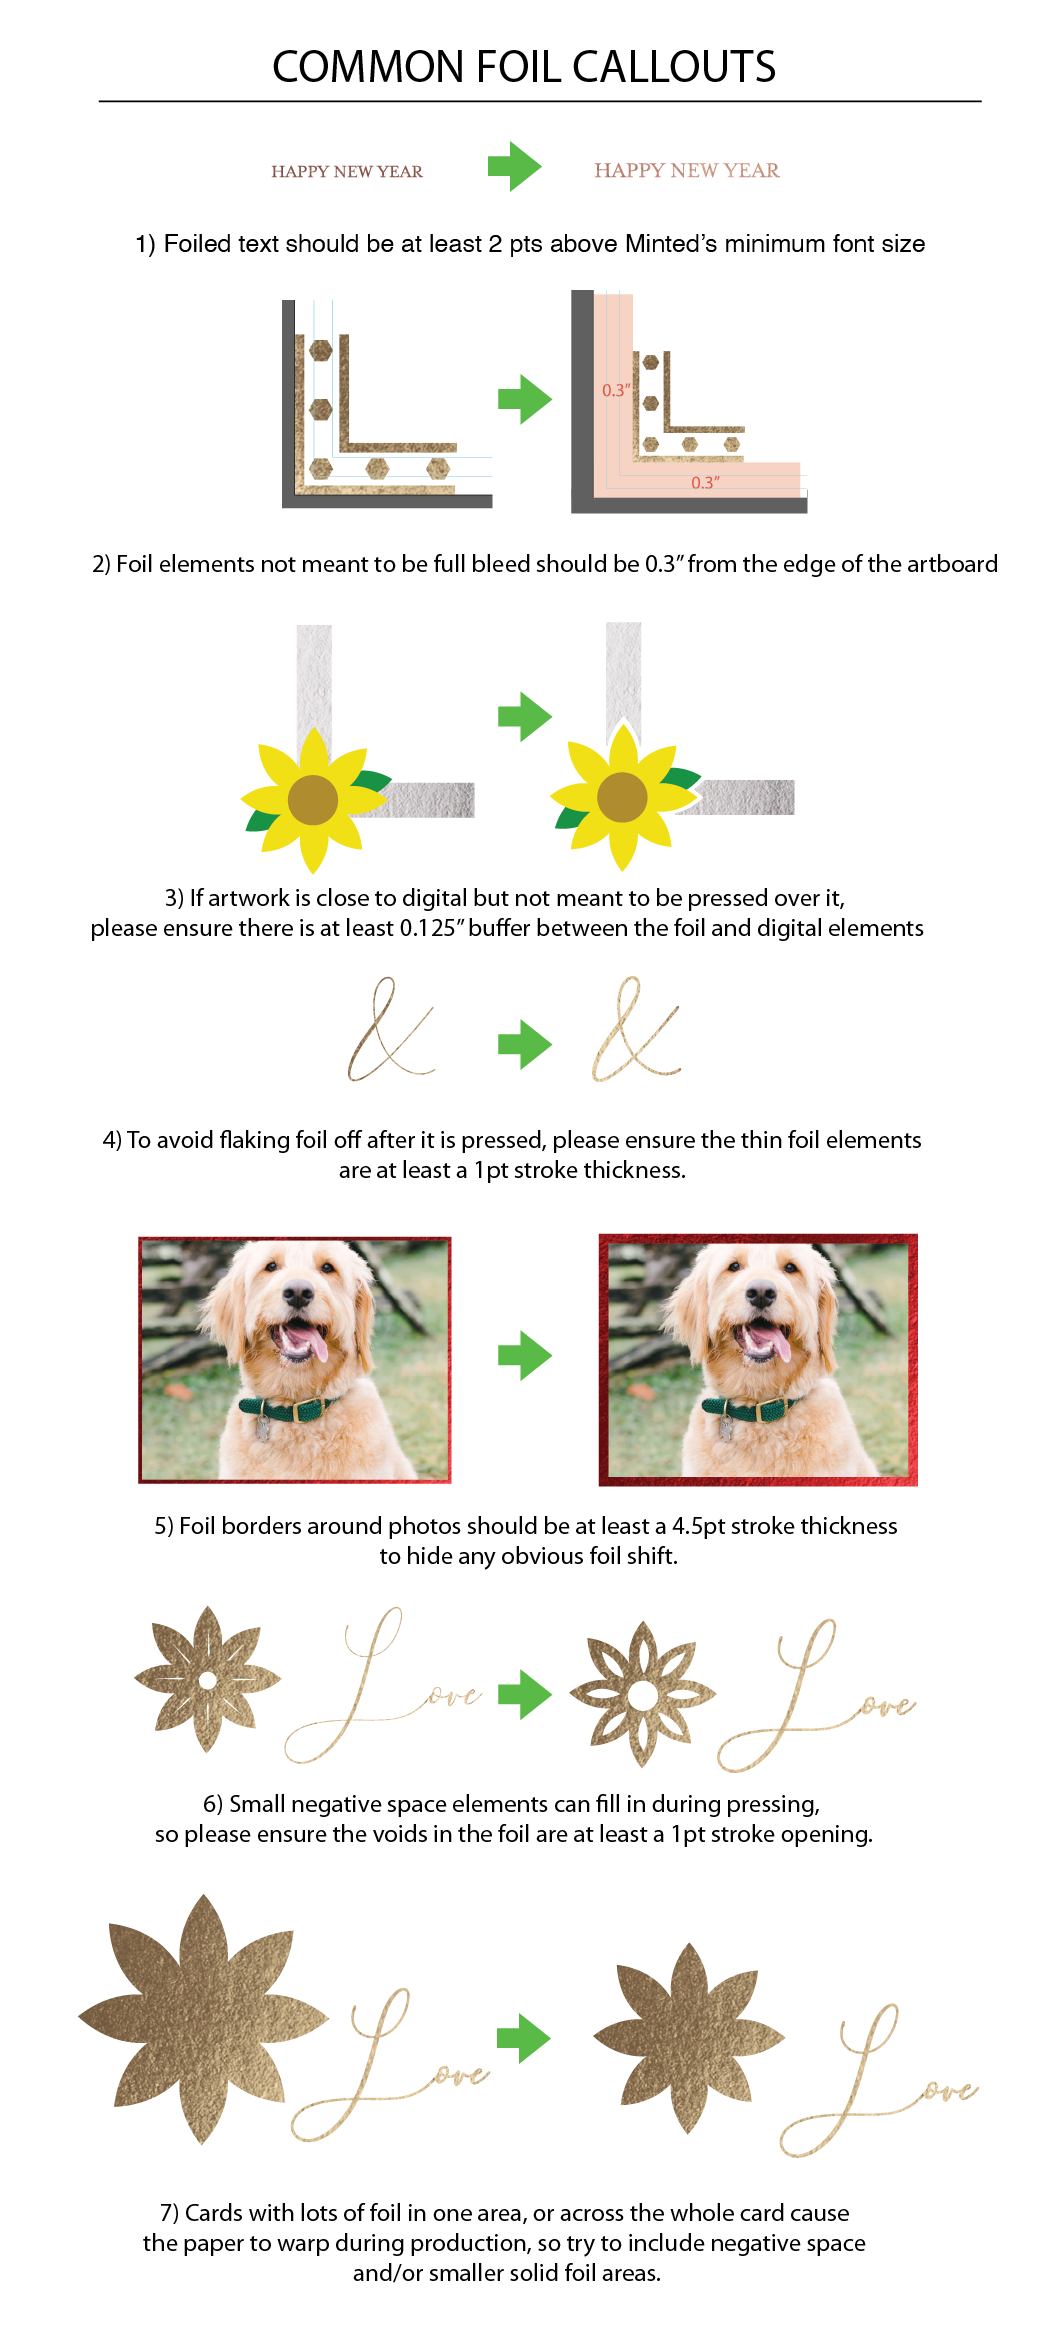
If your card was designed with foil or picked to be printed as a foil card, here are some common foil issues to avoid when setting up your foil design:
Creating Foil Elements:
In order to create foil dies correctly, foil elements need to be set up in one compound path using one clipping mask. Follow the steps below to set up foil elements properly in your files.

- Expand design elements: All foil elements should be fill-only (no strokes applied). If foil elements include strokes, expand appearance to convert them to fill-only (Object > Expand).
- Make a compound path: Combine multiple design elements into one compound path by using the Compound Path function in the Object menu (Object > Compound Path > Make).
- Create foil clip group: Use this compound path as your clipping mask by placing the compound path above a Minted foil texture (Select the compound path and foil texture > Object > Clipping Mask > Make). Place this on the FOIL layer in your templates when done.
NOTE: For more advanced foil requirements, please review Working with Foil & Gloss-Press®.
Comments
0 comments
Article is closed for comments.